For ongoing projects at Sprintsuite we understand it is vital to have a live gross estimation of financial commitments for a Job as well as the ability to manage cash flow by creating claims (invoicing increments).
As part of the Invoicing feature we have built in the ability in each Job to create, manage, monitor and complete the claim process.
How do i create a claim?
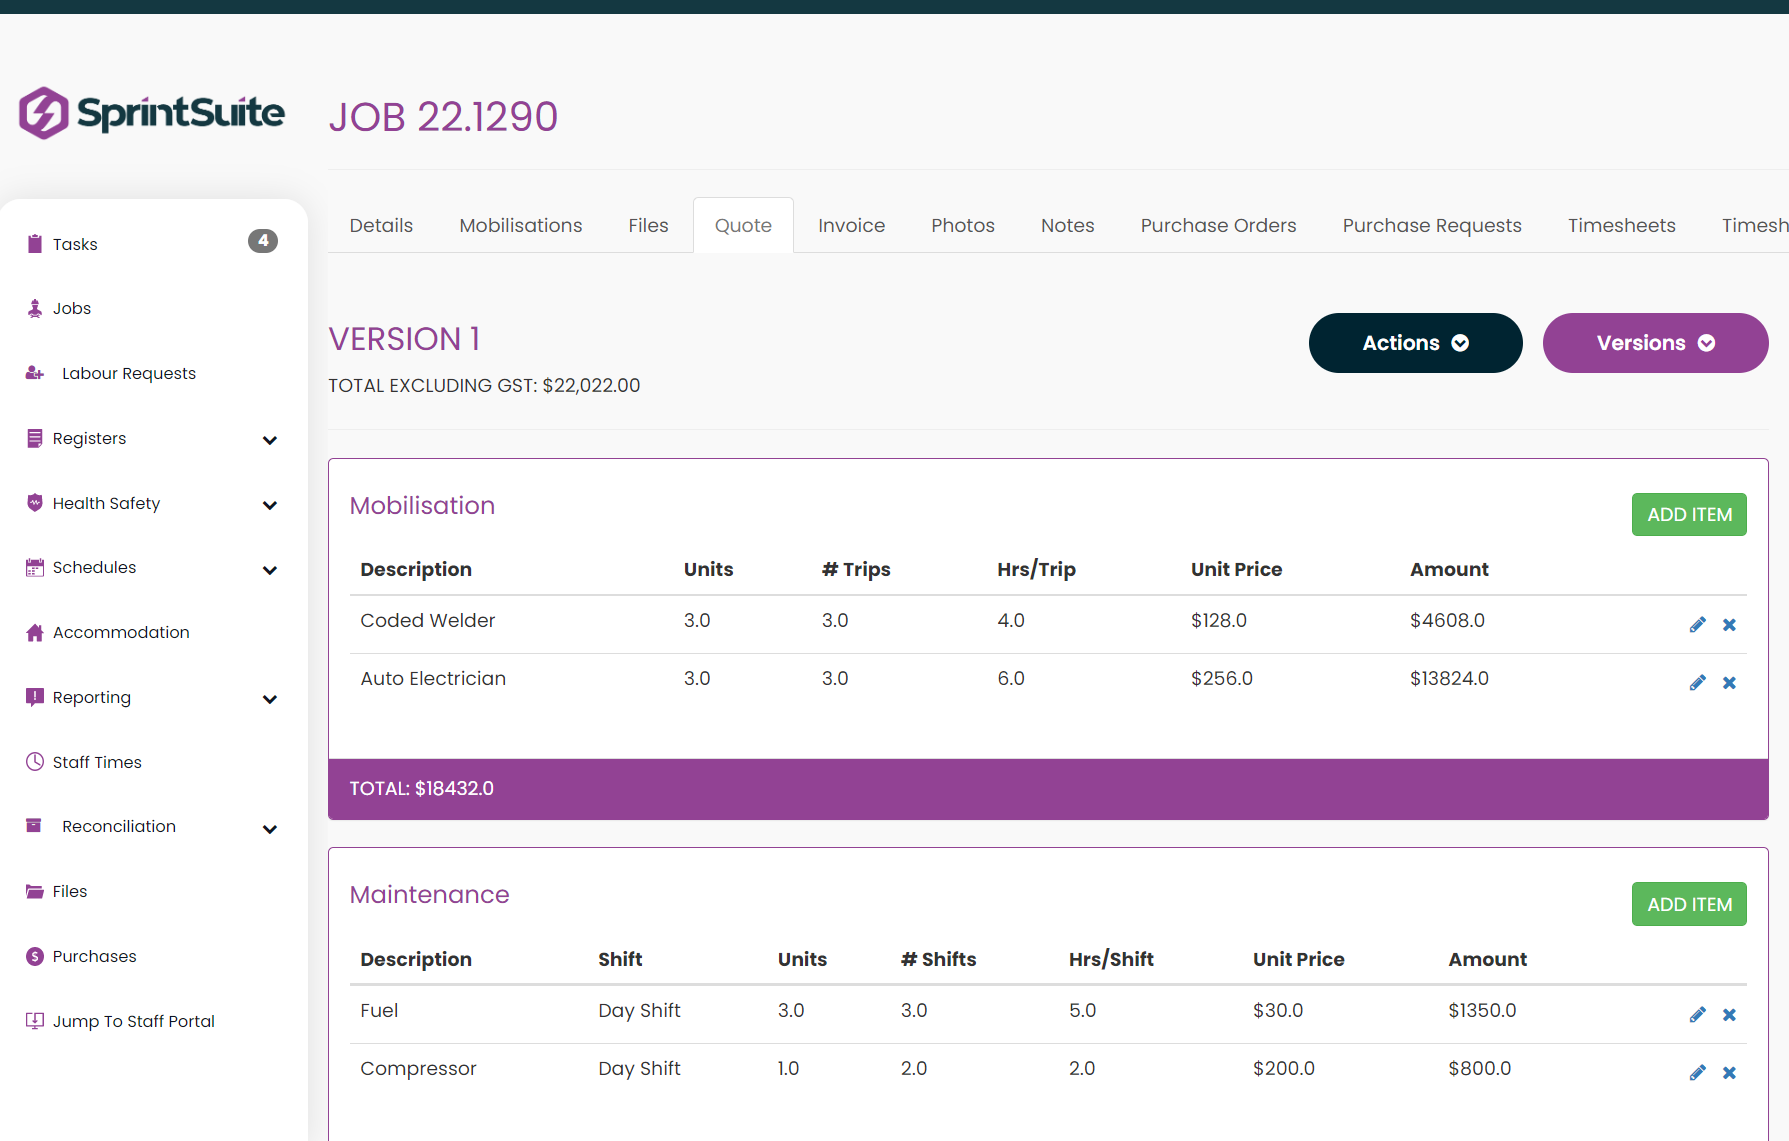
1. In your Job first ensure there is a Quote entered, the expected revenue on the Job is listed and detailed in the Quote tab of a job.
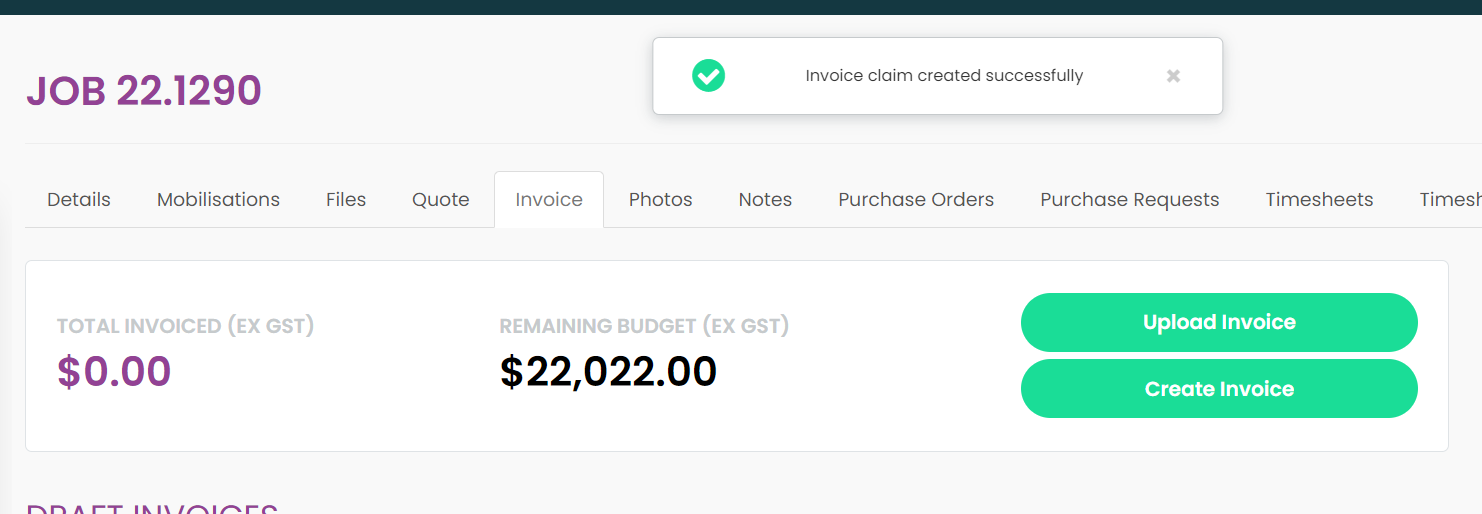
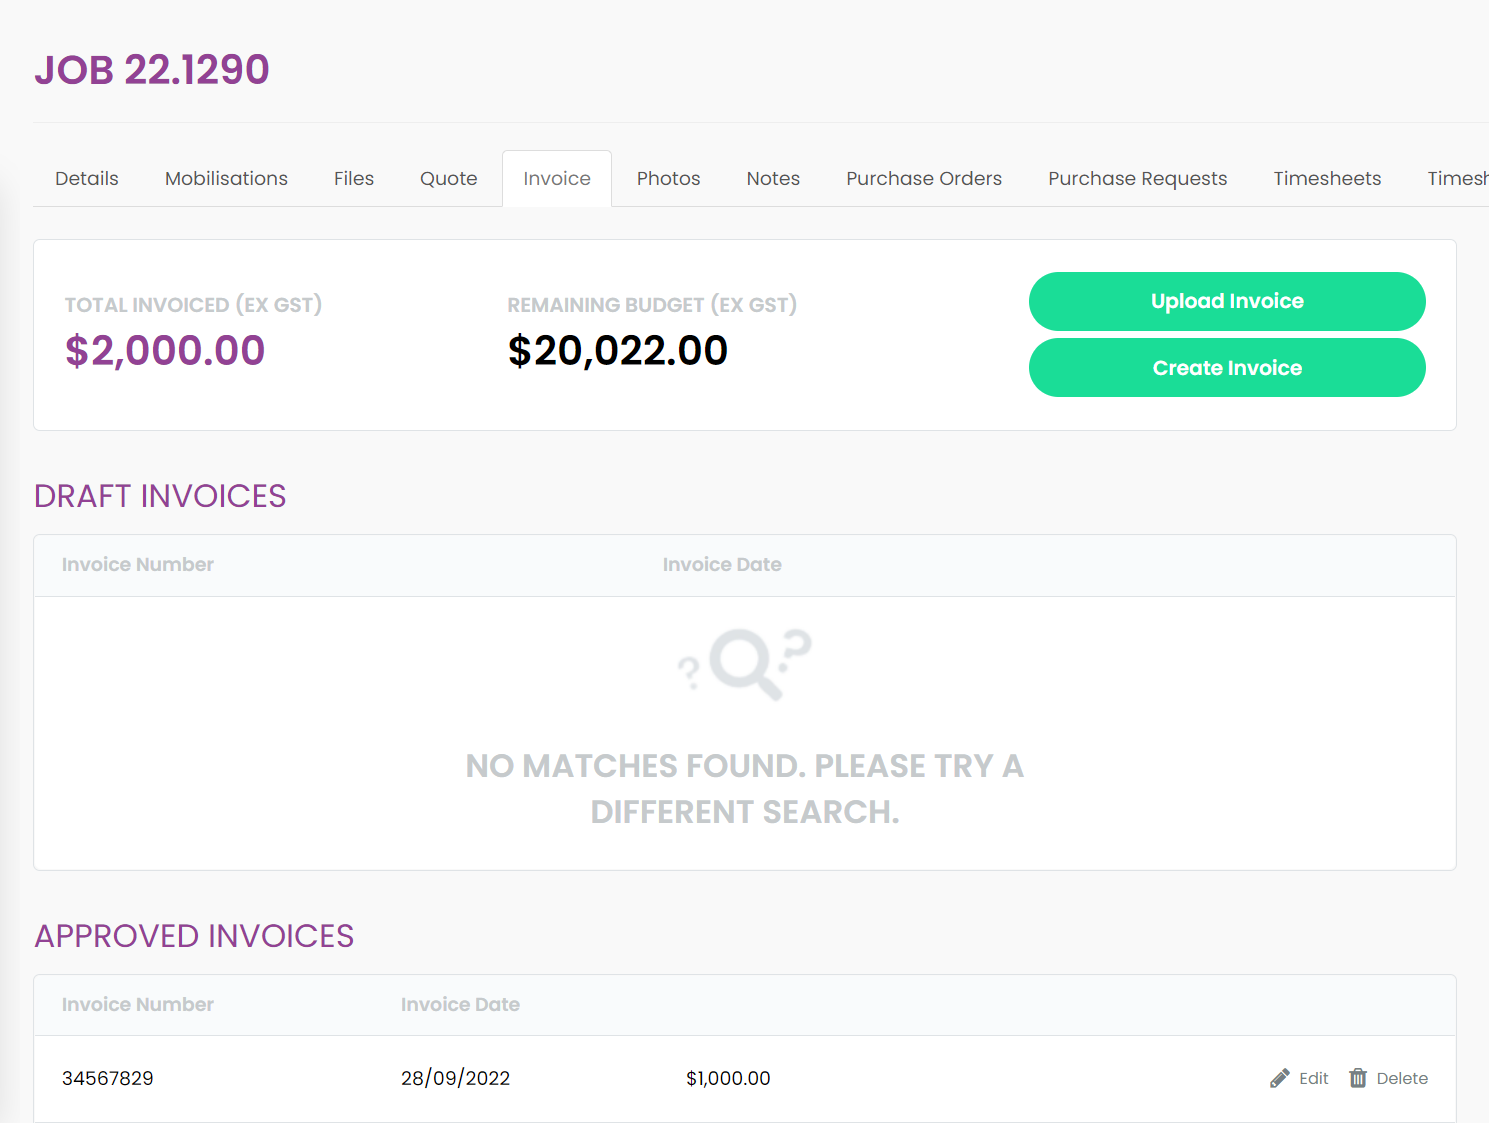
2. This expected revenue from the Quote Tab pulls budget data into the Invoice Tab by showing the user a summary of Total to be Invoiced in the top left of the page, and comparing that to the Remaining Budget (budget left after invoices have been sent) to the right of the page.
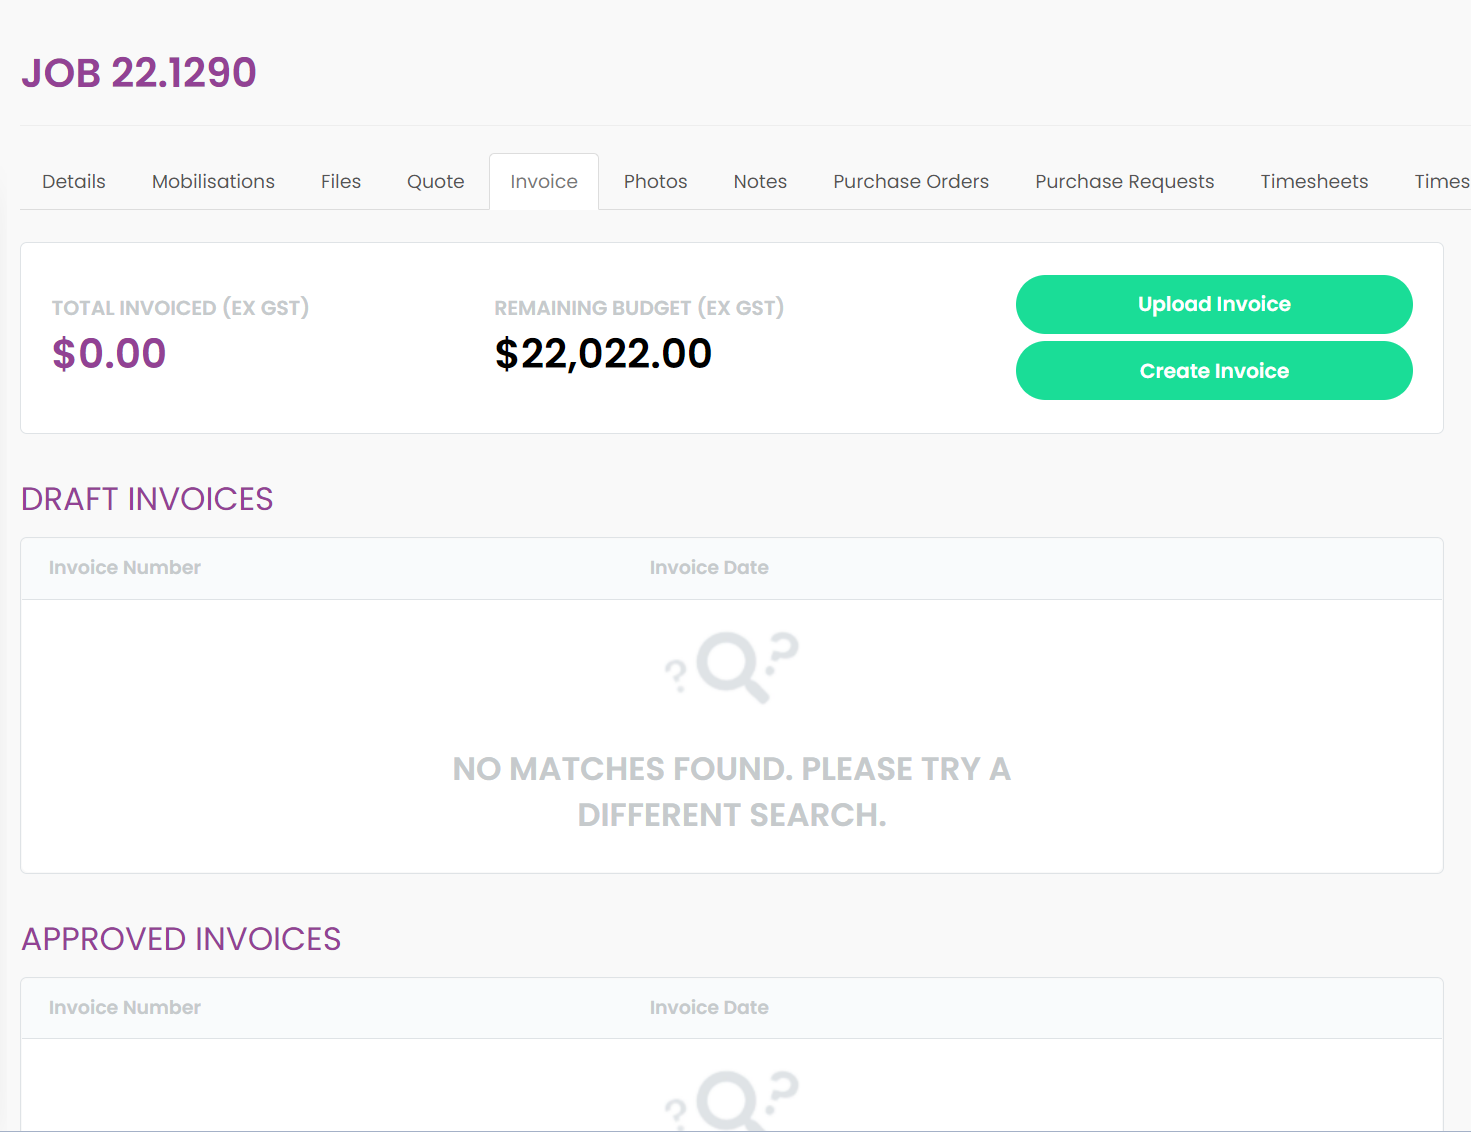
3. Towards the bottom of the Invoice page, you will see the Claims section under the Approved Invoices section.
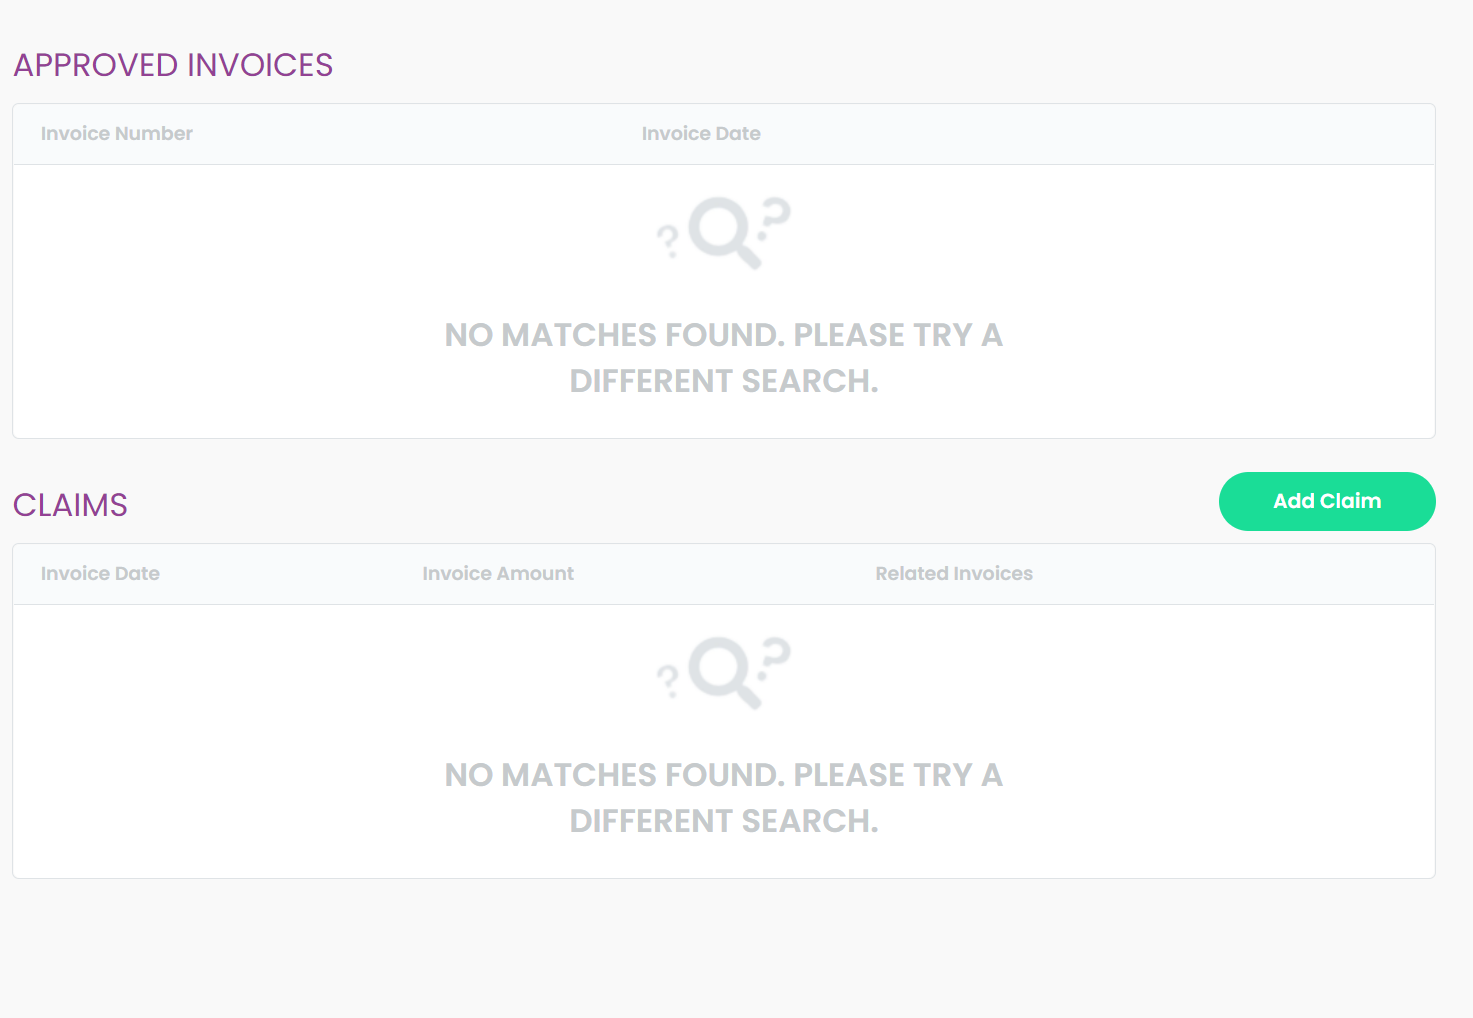
4. To create a set of claims press the Add Claim button. The New Claim modal will appear like below.
Enter the intended claim date, and the amount of the claim invoice, a short description and then press Save. You can future date any claim you wish to.
5. Now that your Claim has been created, it will appear in the claims section.
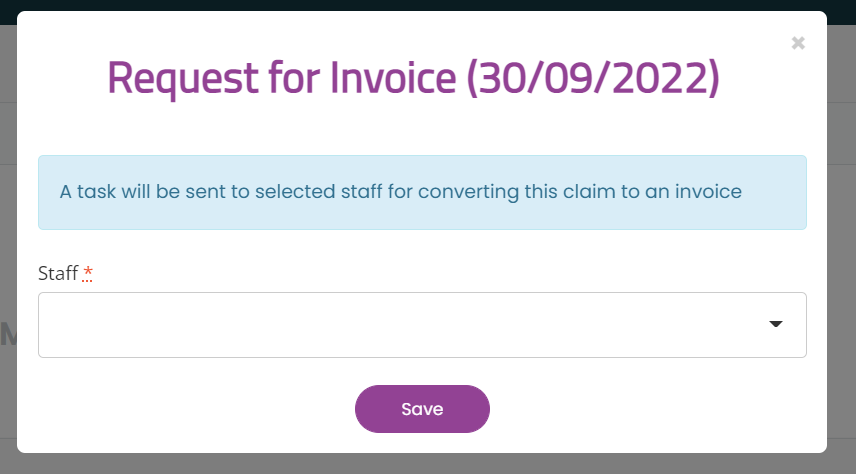
To send a request to another staff member to action this Claim and create and send an invoice to the client press the Request Invoice button.

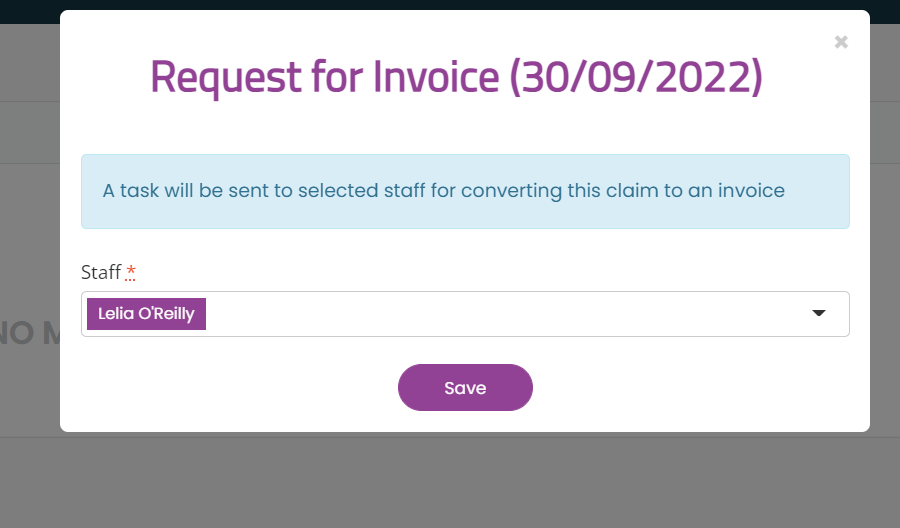
A Modal will come up on the screen and ask you which staff member will be nominated to receive the Claim task. Select the staff member from the drop down list and press Save.
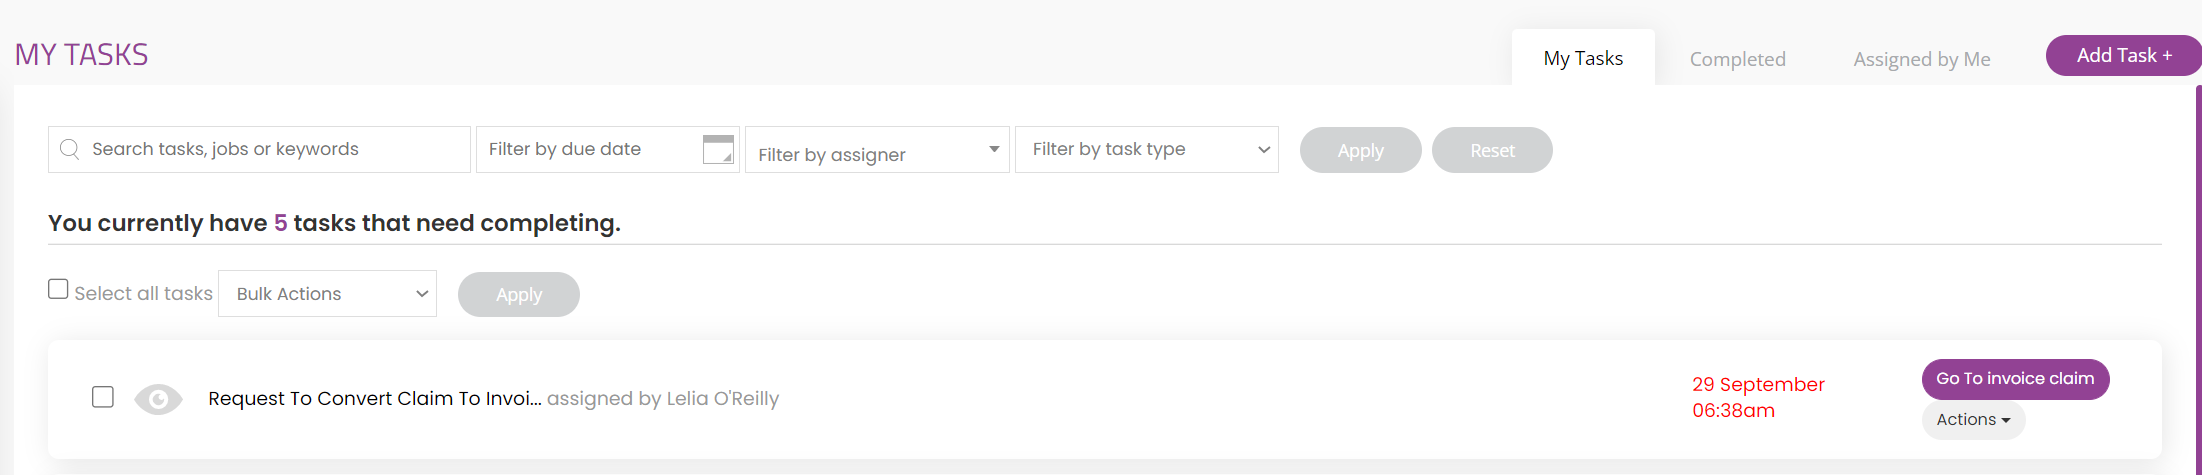
6. The nominated staff member will receive a task Request to Convert Claim to Invoice.
The staff can open the Task by pressing the eye icon, alternatively they can click on the Go To Invoice Claim button to the right of the task.
7. Press the Go To Invoice Claim, The system will re-direct the user to the Invoice summary of the Job. The user will scroll down to the bottom of the page in the Claims section.
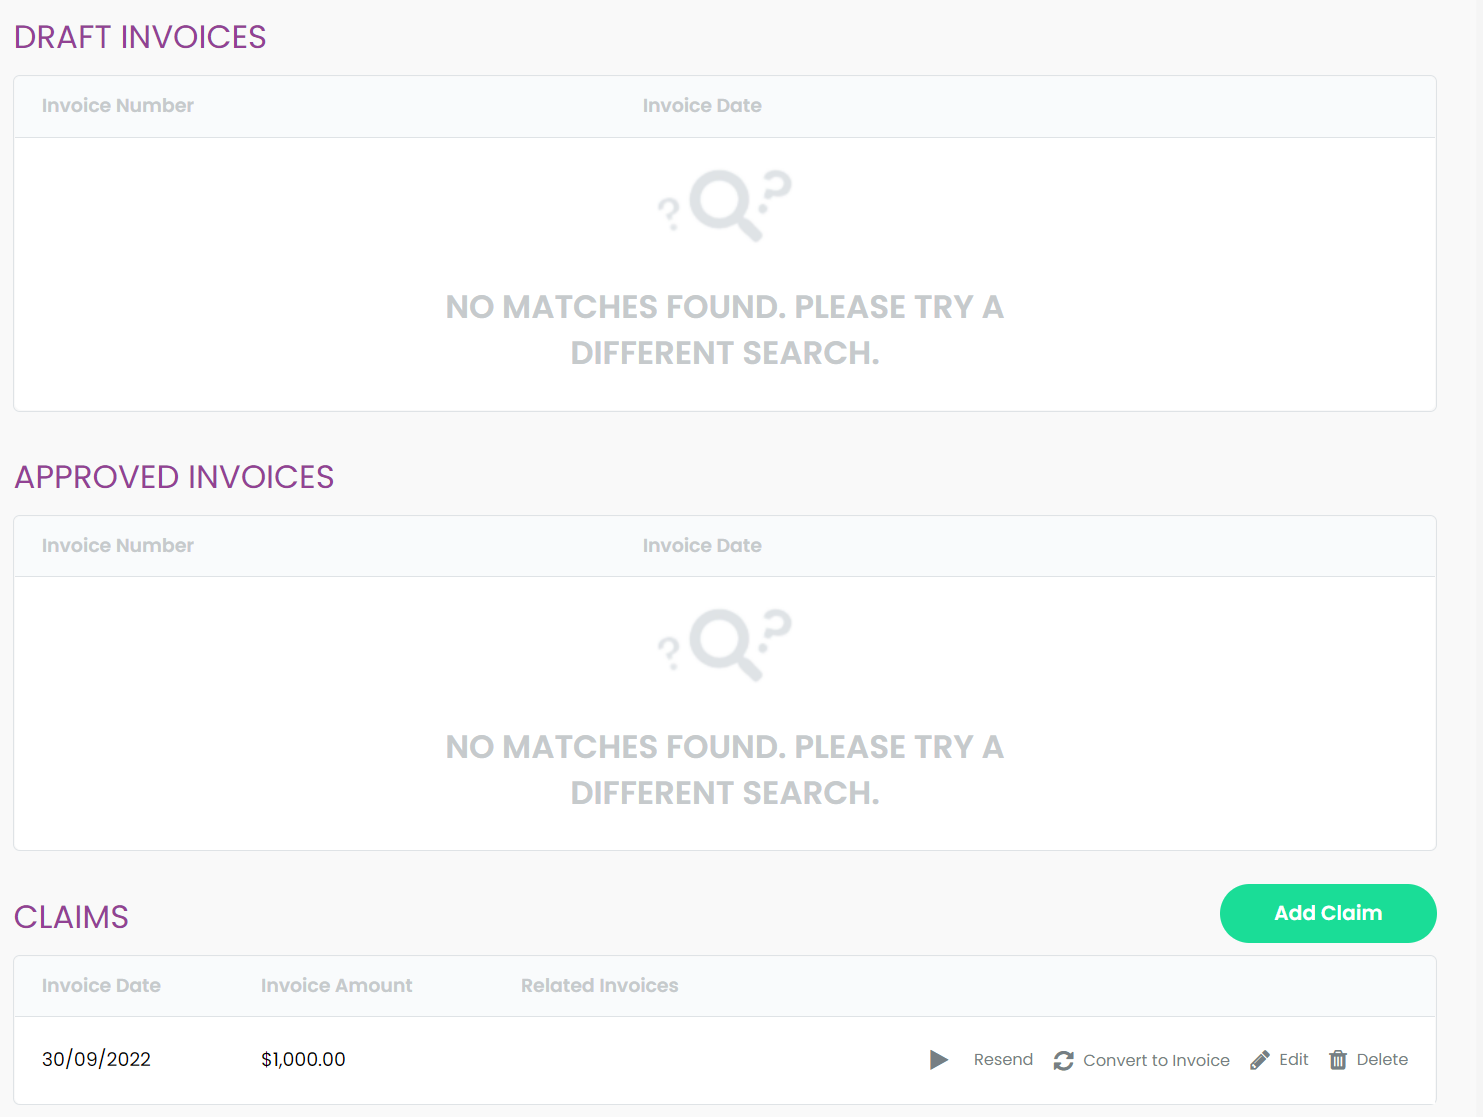
7. The user (on the day of the invoice date) will action the Claim request by pressing Convert to Invoice. A drop down will provide two options. Upload invoice (sent from an external accounting software) or Create an invoice in Sprintsuite As Per Quote.
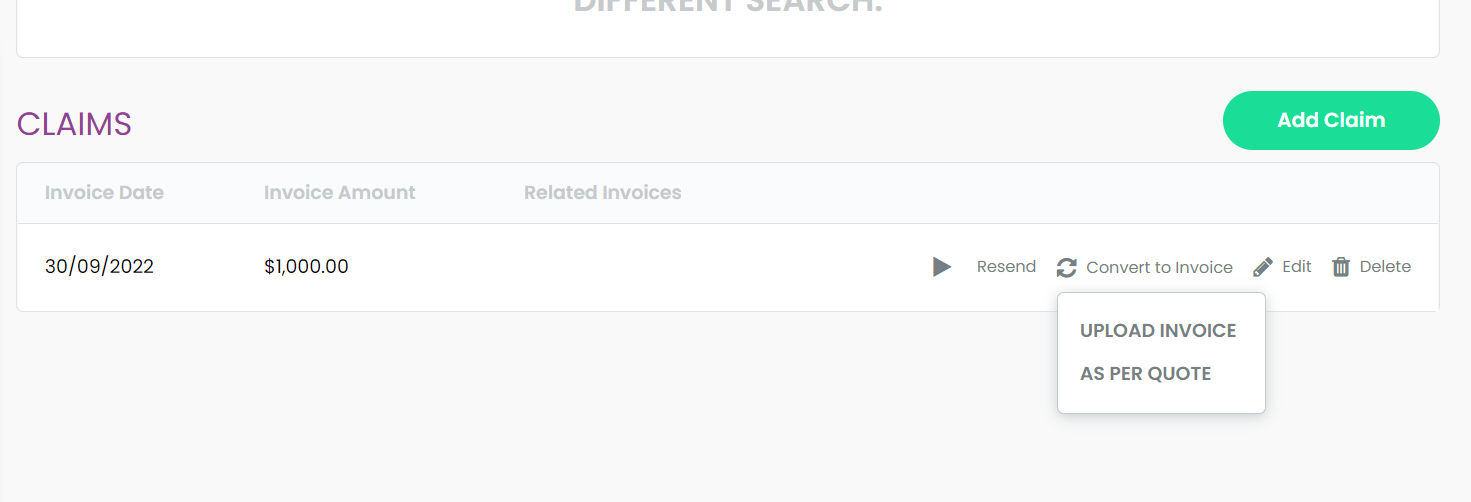
8. If an invoice claim has already been created and sent in an external accounting software, click on Upload Invoice. Enter the invoice claim ID, and upload a PDF or Word file of the invoice, Press Save Invoice.

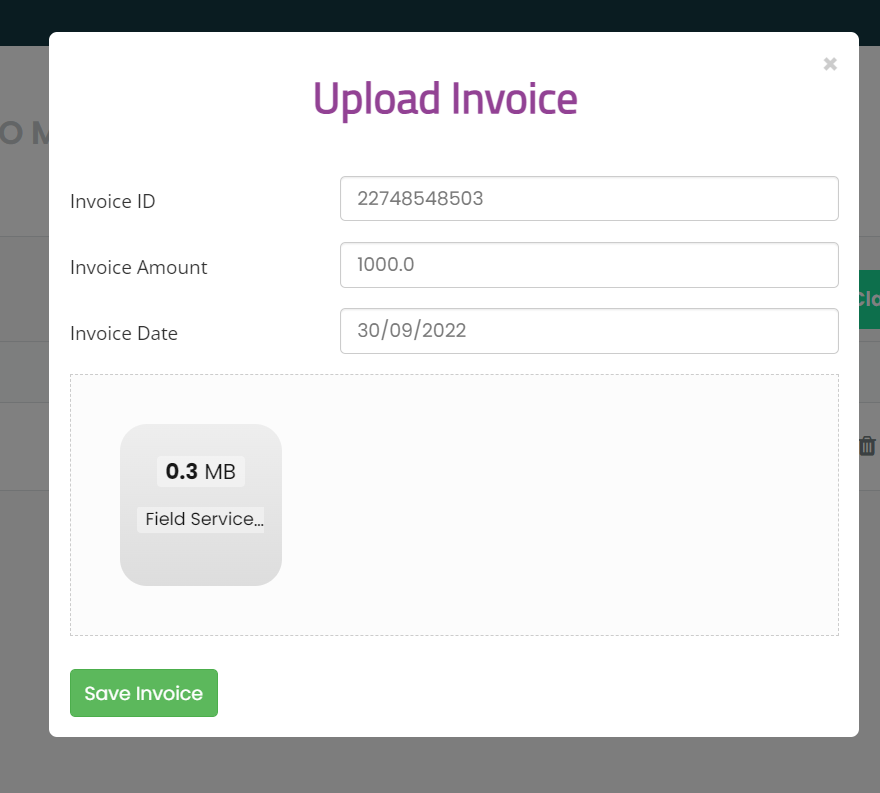
The system will automatically complete the Task that was given to the staff member and re-direct the user to the Invoice summary page, showing the invoiced amount in Total Invoiced, showing the invoice recently uploaded in Approved Invoices section.
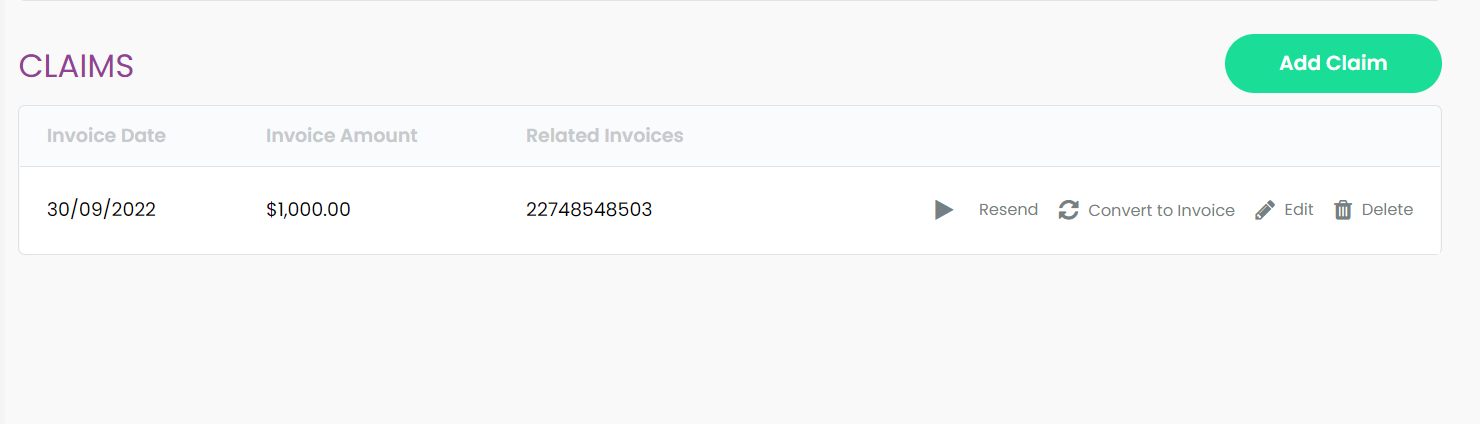
The Claims section will now show the related invoice number against the claim, as well as the ability to Resend the task, edit, delete and create another invoice.
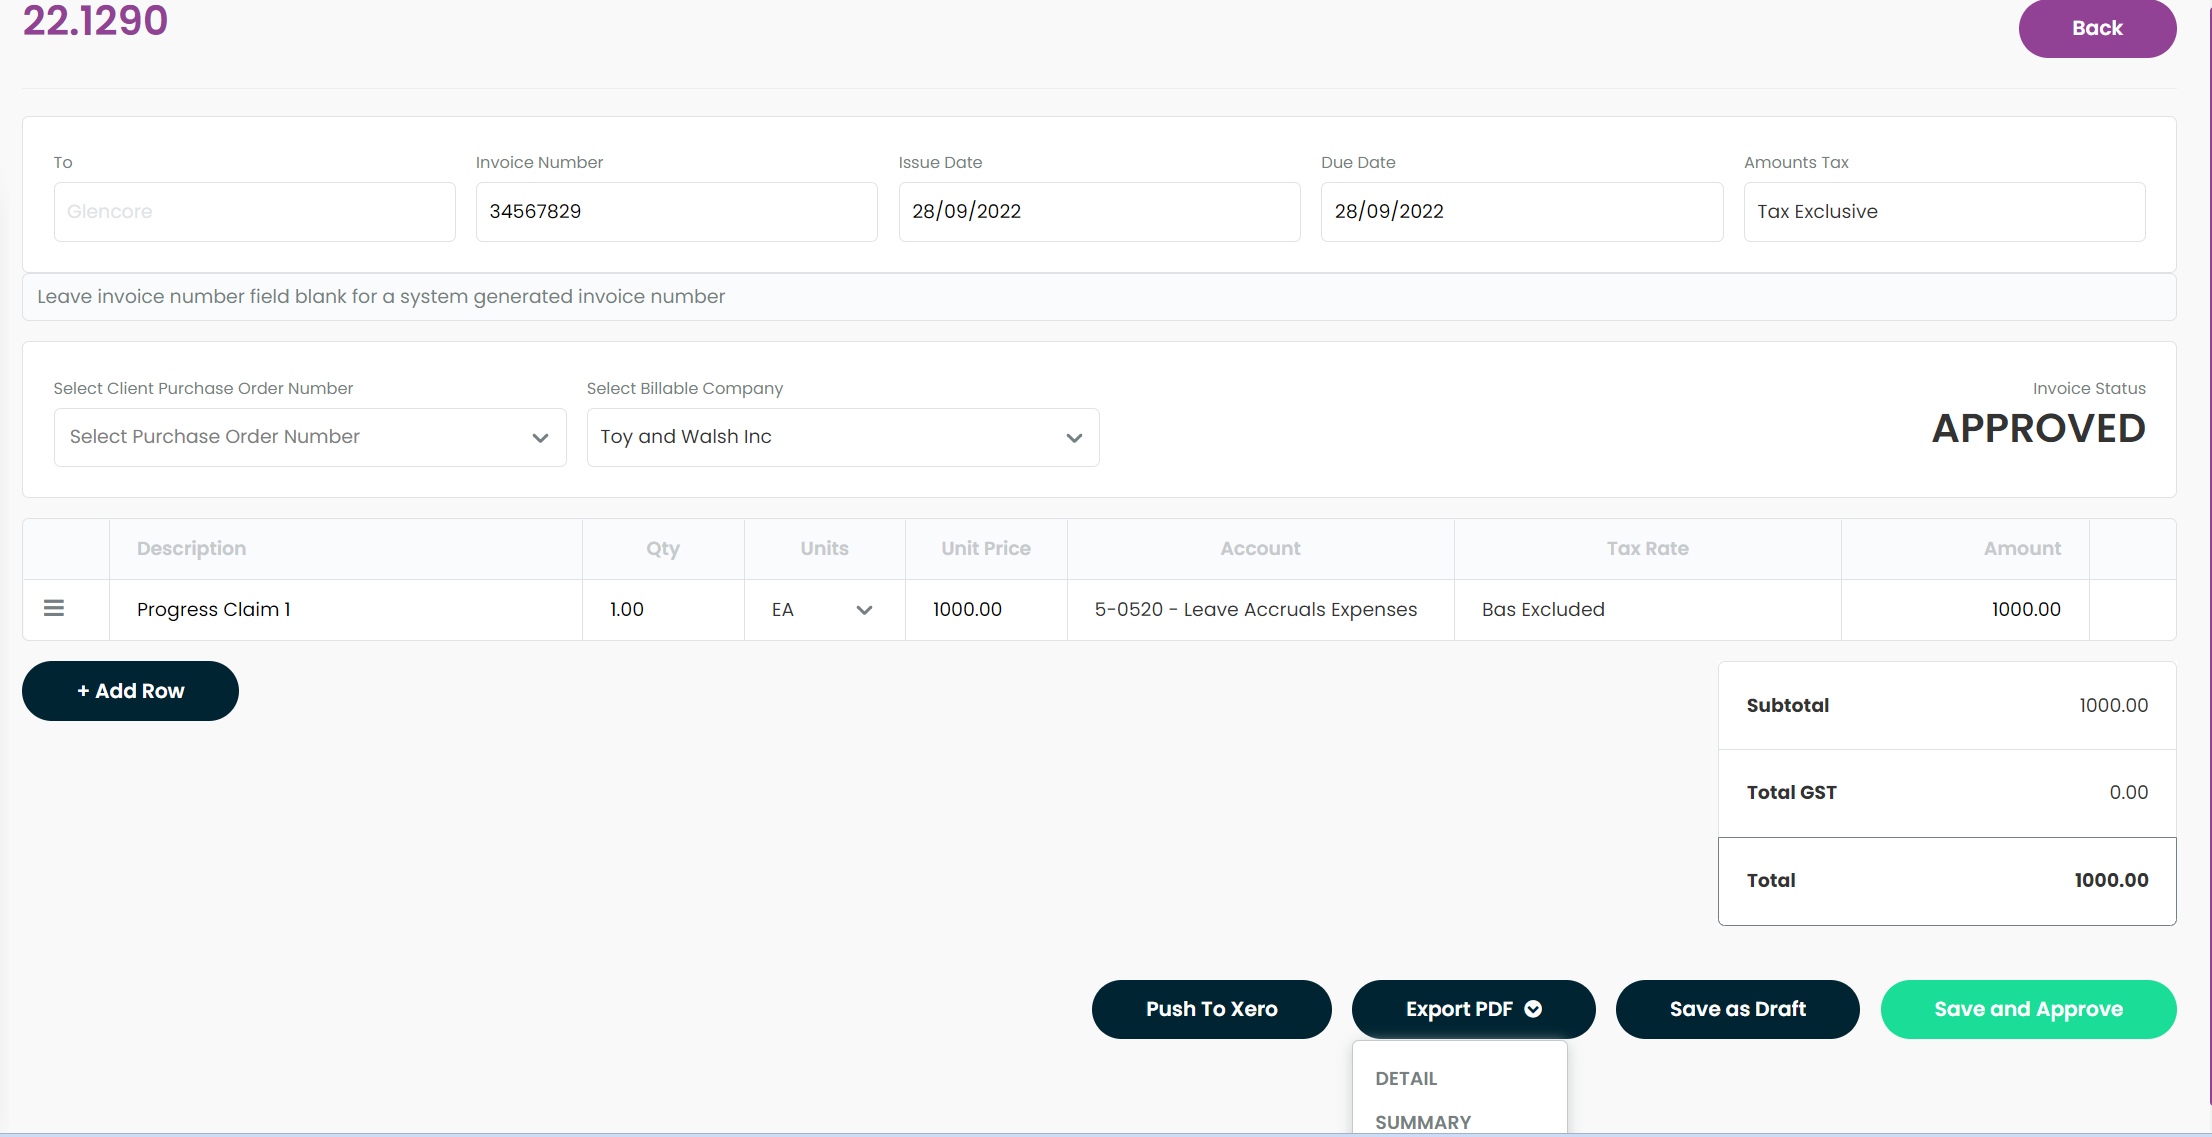
9. If you are going to create an claim invoice in Sprintsuite (instead of another accounting software) click on As Per Quote. This will open up the invoice template in your view like below, populated with line items from the Quote Tab.
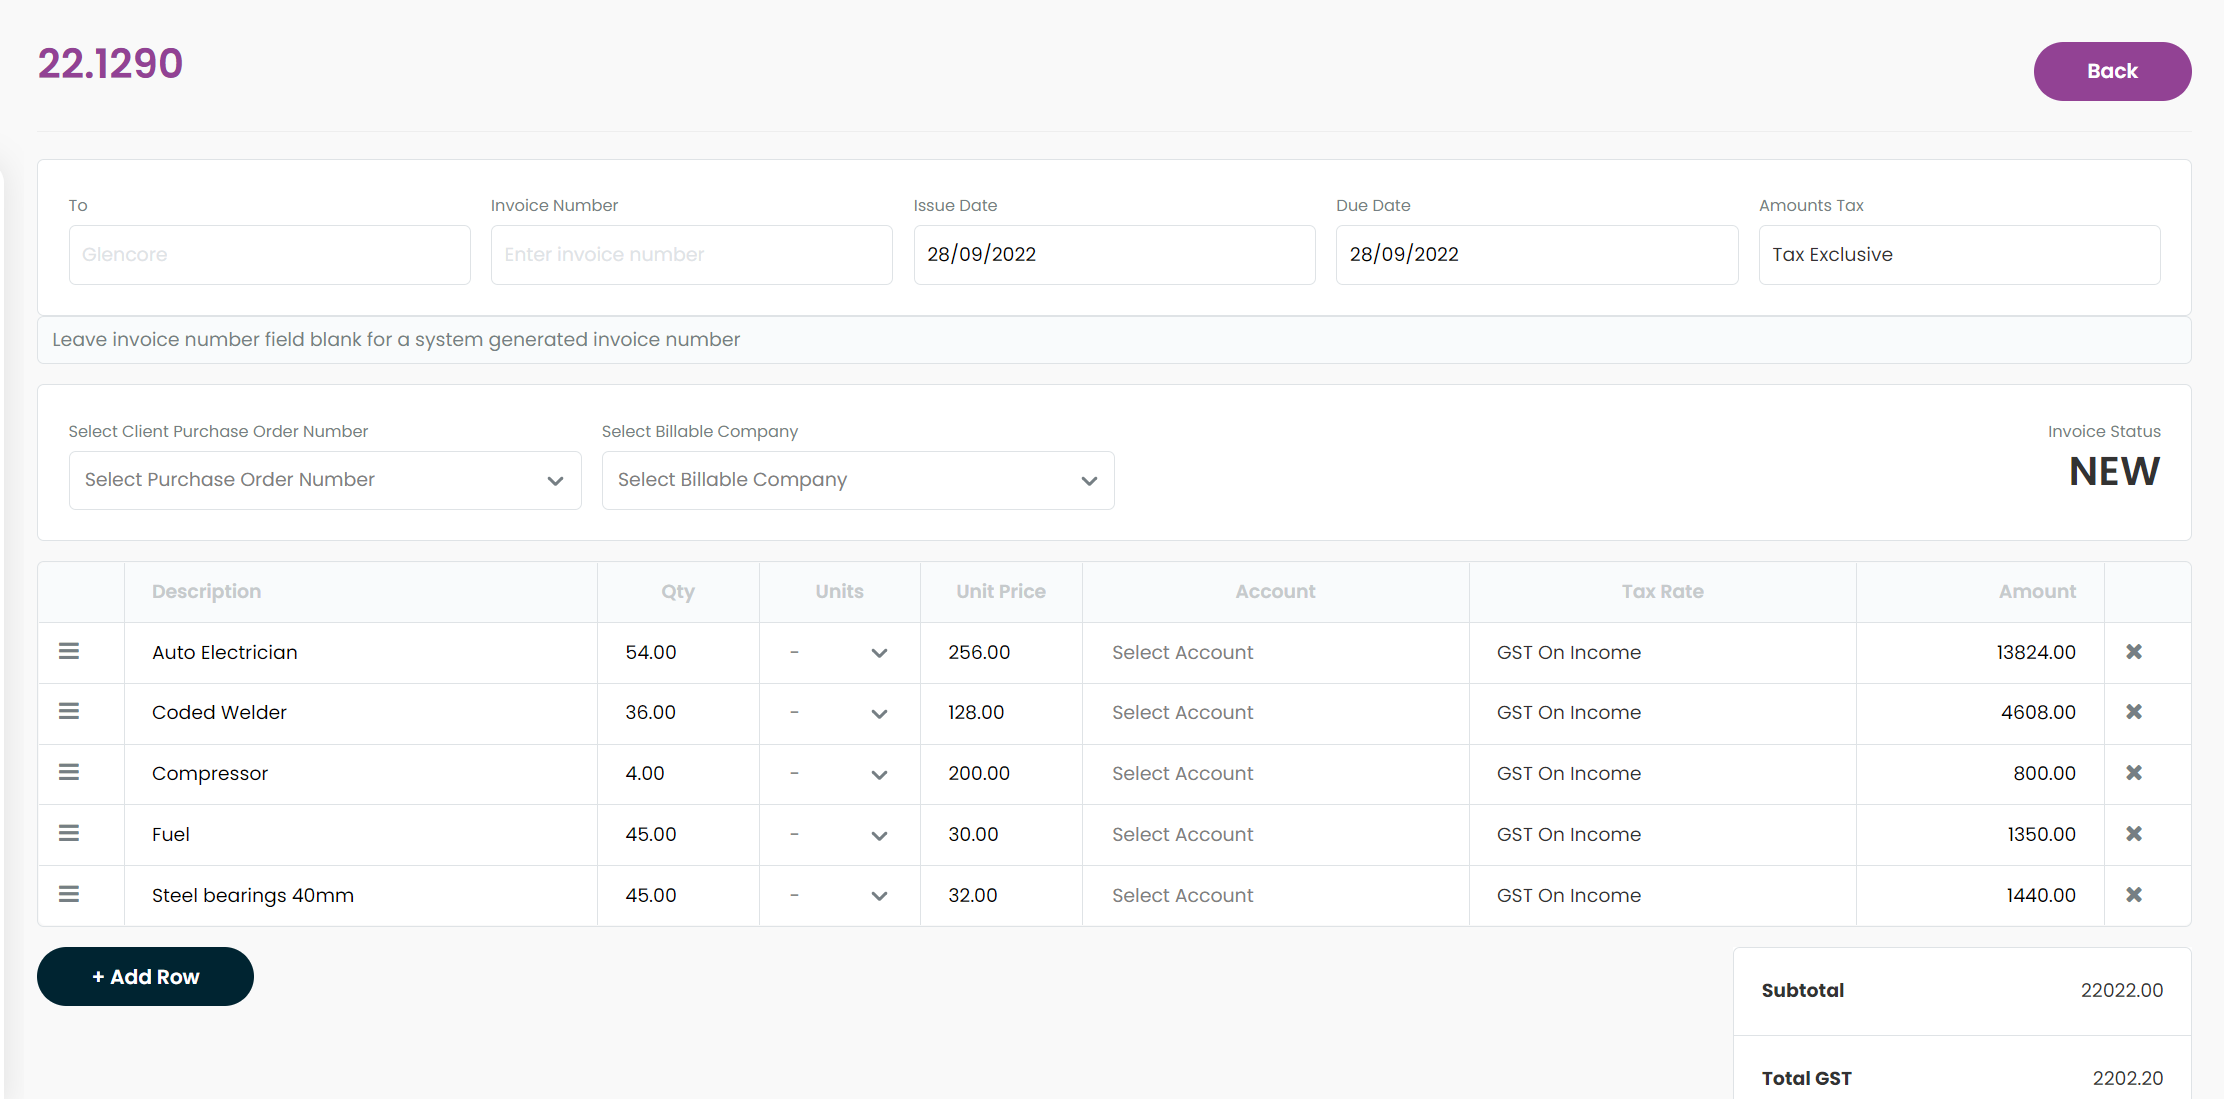
Feel free to add / edit/ remove and irrelevant line items and ensure the following mandatory fields are entered when creating the invoice:
Invoice number (if pushing to Xero this can be left intentionally blank)
Billable Company
Line item Description
QTY
Units
Unit Price
Revenue code (if applicable)
Tax Rate
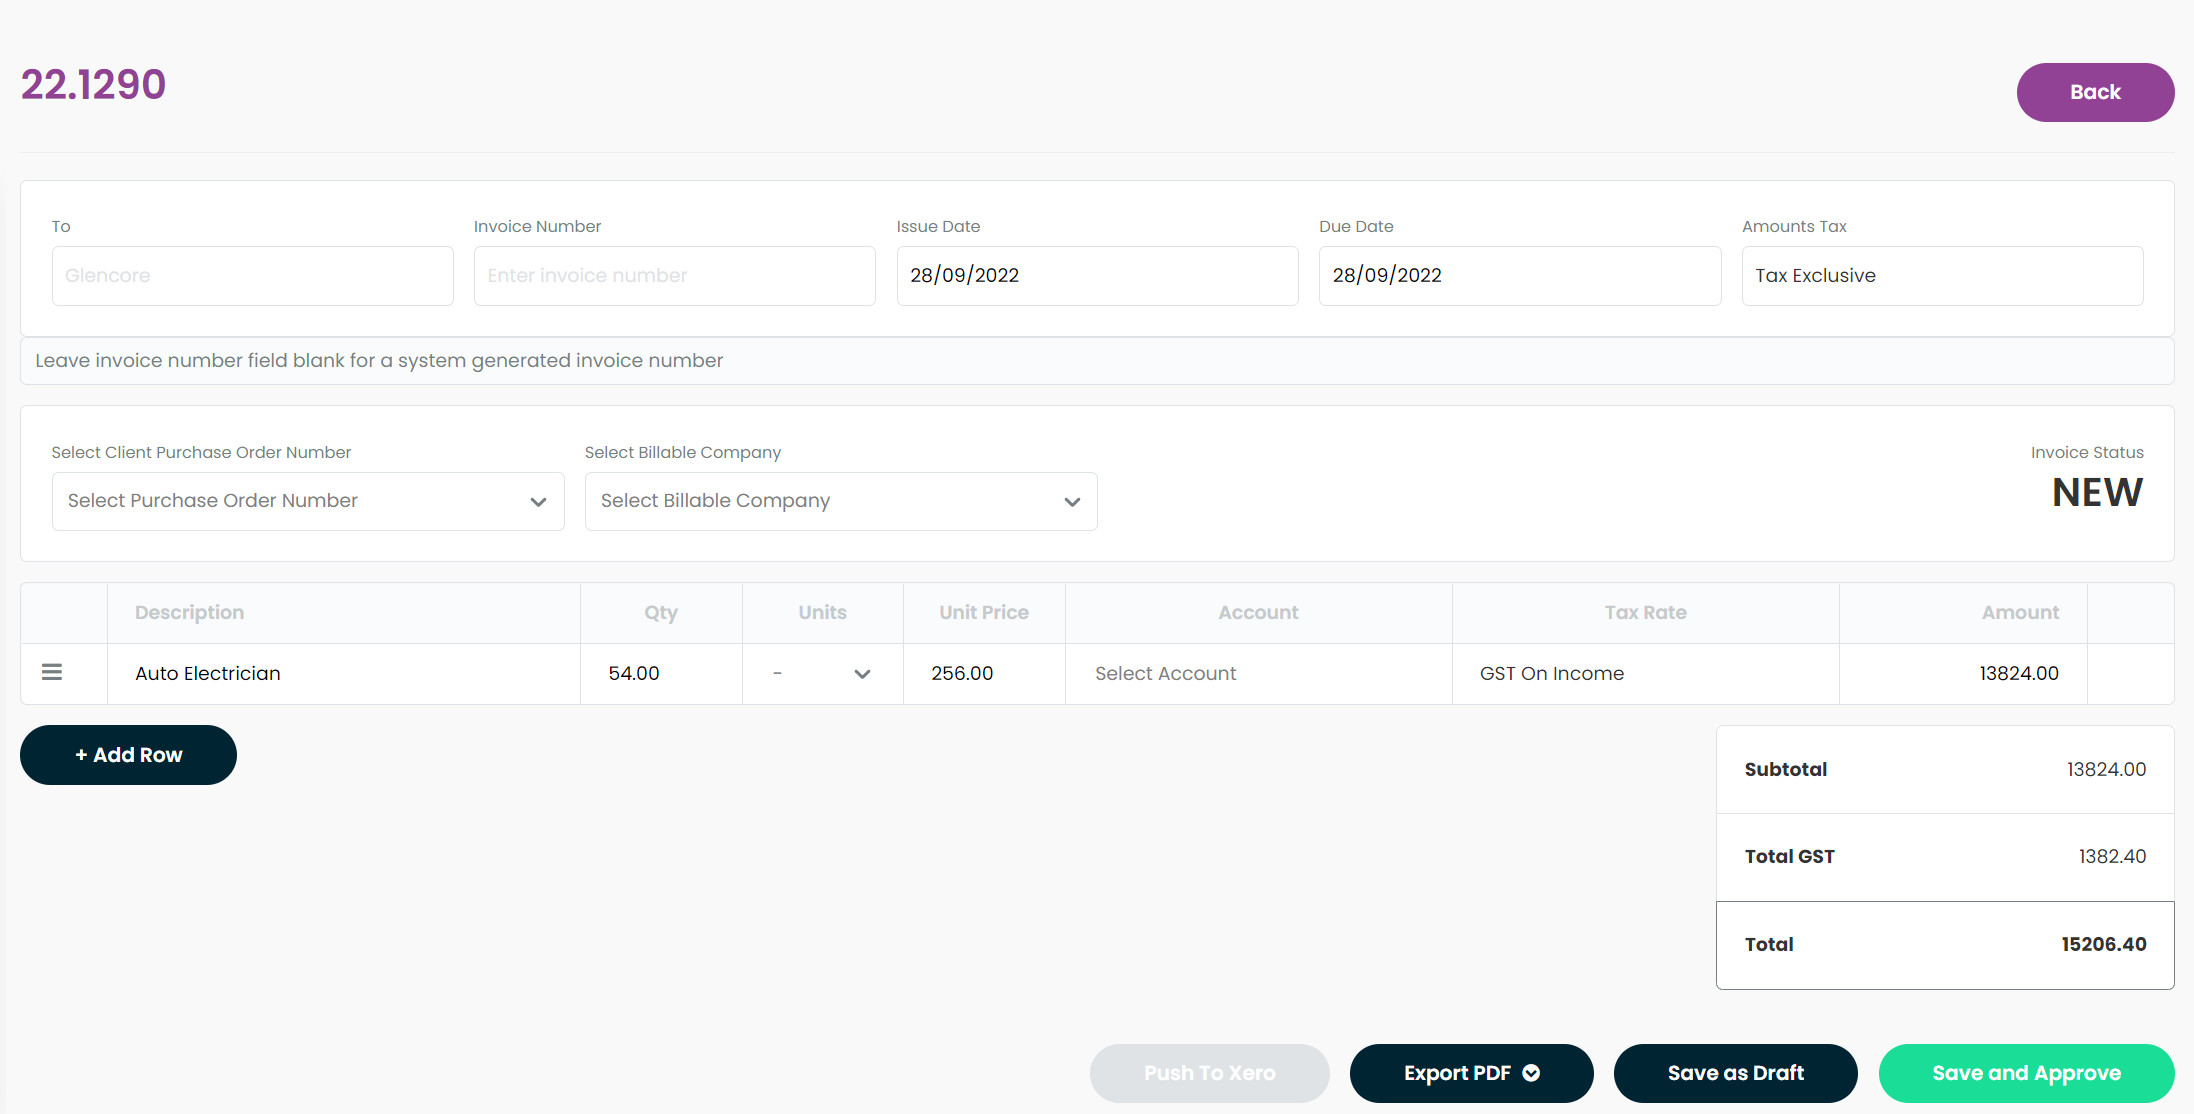
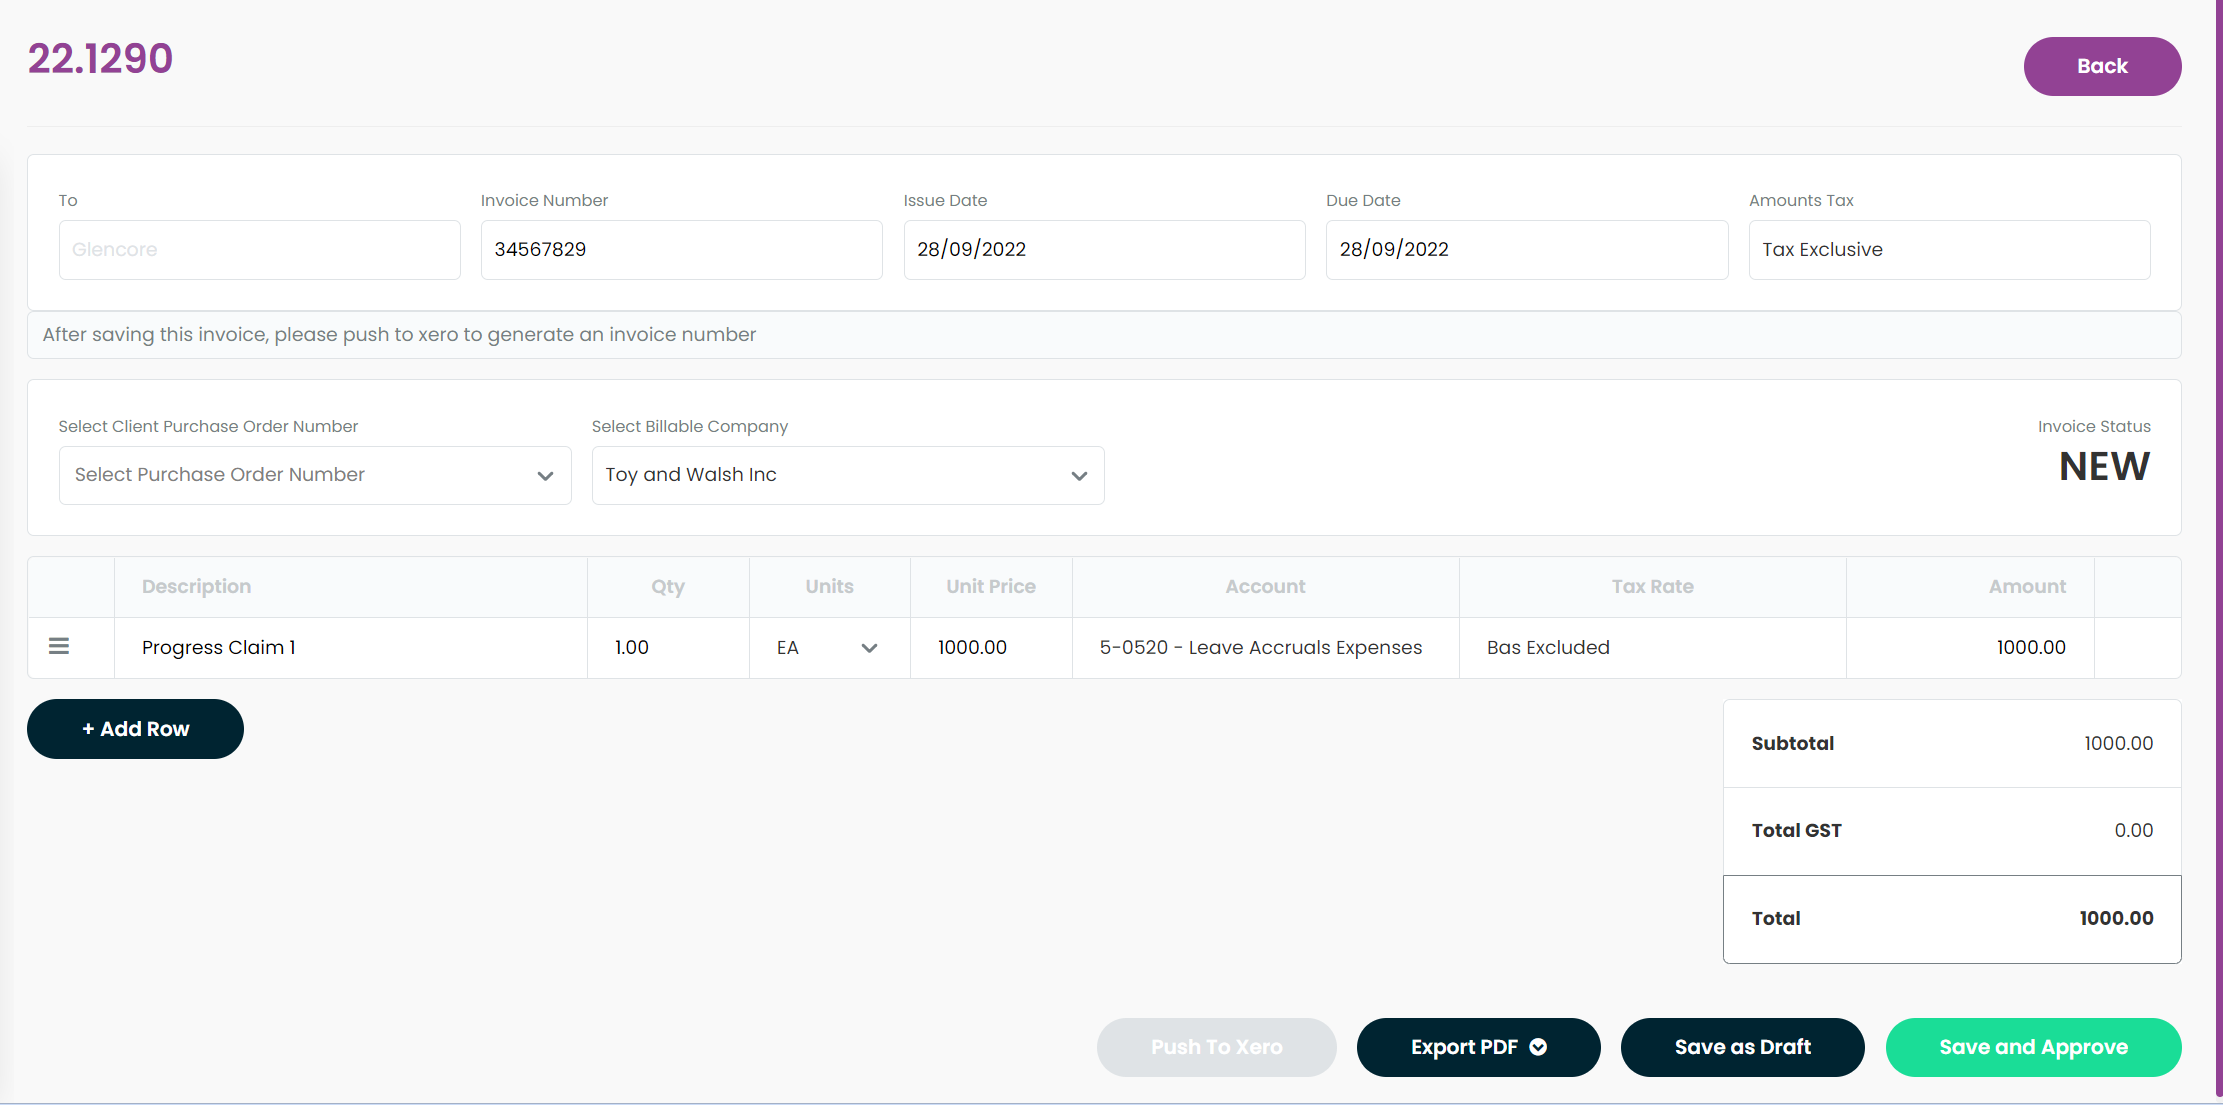
When satisfied with the invoice layout press Save and Approve.
This will now add the invoice into the Invoice summary Approved Invoices table.

Once an Invoice is Approved, a user can choose to export the invoice in a PDF, by clicking on the Export PDF button, a drop down list will allow two options of invoice template to be exported Detail or Summary.
Detail invoice template exports line item descriptions, QTY, Units, unit price and total.
Summary invoice template exports line items with just a Description and total.
How does Push Invoice to Xero work? (Only for active Xero-Sprintsuite integrated customers)
1. Once an invoice has been Saved and Approved the Push to Xero button will appear. Click on Push to Xero.

2. If your Xero cannot find your client in their customers base, the following message will come up asking for permission to add this client as a new contact in Xero.
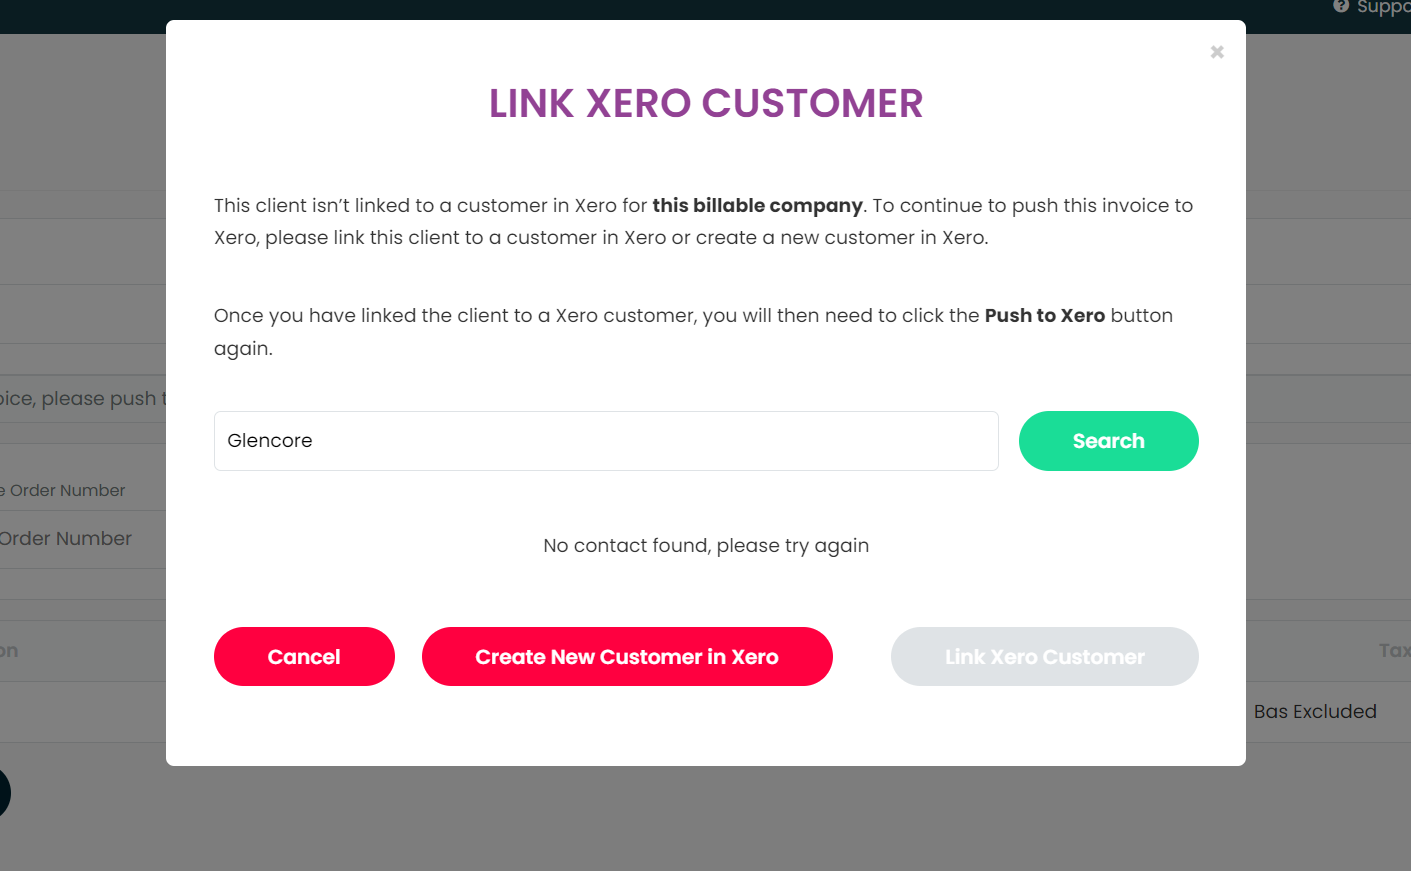
Click Create New Customer in Xero. This will add the customer details in to Xero, apply the next Xero Invoice number to this invoice, as well as push the invoice into Draft in Xero ready for processing.
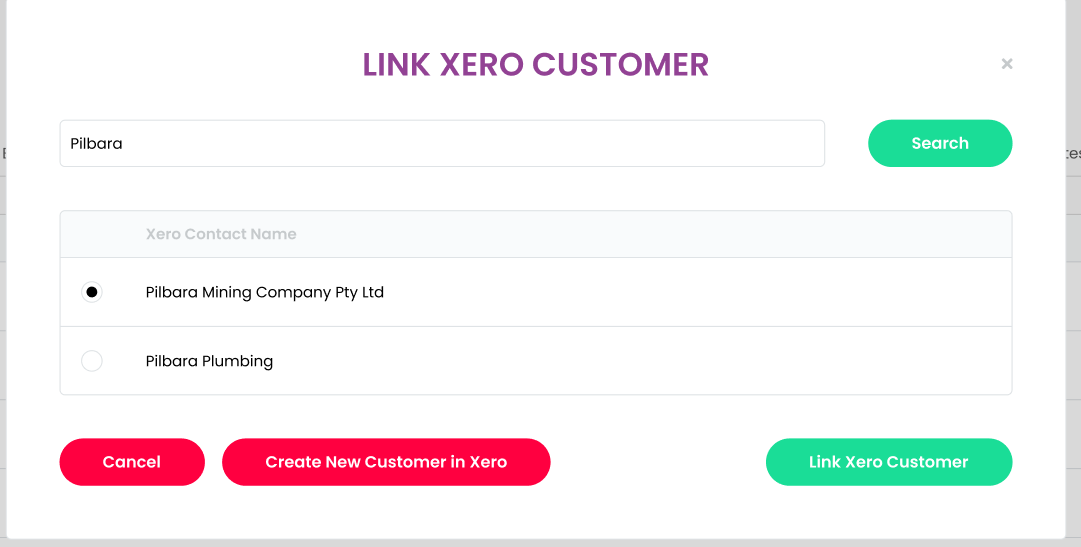
3. If your Xero does link your Sprintsuite client to a customer in Xero the below will come up with Push to Xero is clicked.
The form will ask you to confirm which customer in Xero you want to link this Sprintsuite client and invoice to, click on the customer check box that you wish to link an press Link Xero Customer. This will push the invoice into Xero and link to your Xero Customer.
You also still have the option of creating a new customer in Xero if you like by pressing Create New Customer in Xero. This will push the invoice into Xero, create a new customer and link your invoice to this new customer.
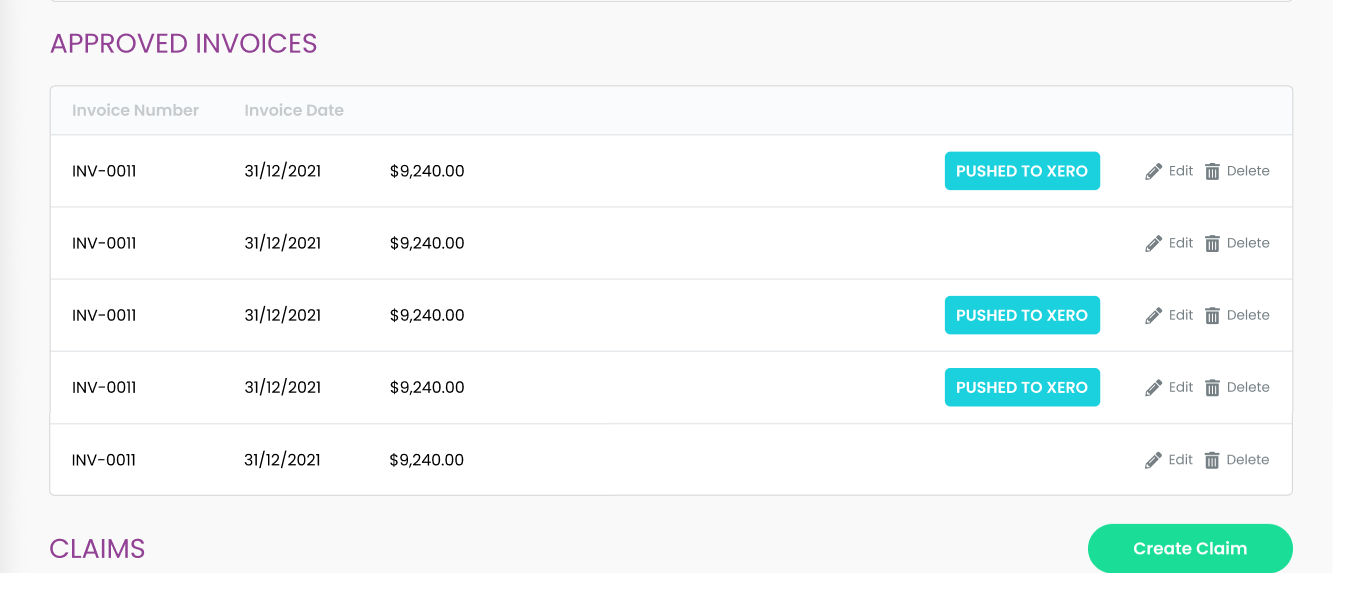
4. When an Invoice has been pushed to Xero, you can see the status of these on the Invoice summary, Approved Invoices table, showing a Blue button next to each invoice labelled pushed to Xero.
Managing Claims
Future dated claims can be entered as many times as you like for pre-planning, the project manager can monitor what invoices have been sent by coming into the Invoice tab of the job, and the Approved Invoices section, and which claims have been actioned by scrolling to the Claims section and looking for claims with related invoice numbers next to them.